
Have you ever thought, “I use Excel for work every day, but macros and programming seem a bit too difficult…”?
It is true that Excel is primarily a tool for calculations and spreadsheets, but in fact, it is also packed with creative possibilities:
- Color cells freely however you like
- Move, transform, and animate shapes (circles, squares, etc.)
- Play sound effects or text-to-speech audio (with some limits)
Best of all, VBA (Visual Basic for Applications)—the programming environment that acts like a magic wand—comes built into Excel for free.
It is almost a waste to use Excel only for routine office work. You don’t need to buy any extra software. Why not use the Excel you are already familiar with to build something fun?
Let’s take your first step into the exciting world of programming!
What is “Animated Excel”?
Seeing is believing! Here is a preview of an “Animated Excel” project I created:
A circle advances, falls, bounces, and breaks through walls in Excel VBA!
It looks like a mini-game, doesn’t it? Believe it or not, this entire motion is accomplished with less than 100 lines of code.
Now, let’s get everything set up so you can build your own!
Getting Ready
Step 1: Show the Hidden “Developer” Tab
By default, Excel hides the menu tab used for programming.

Let’s change a quick setting to bring it up.
- Click [File] in the top-left corner of Excel.
- Select [Options] near the bottom left.
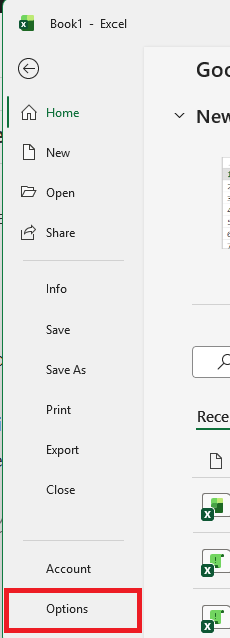
- Choose [Customize Ribbon] from the left-side menu.
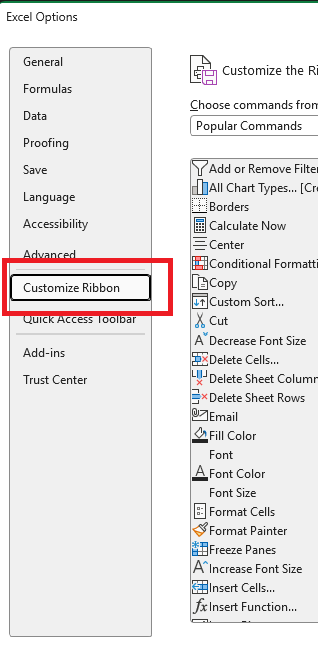
- Check the box for [Developer] in the right-hand list and click [OK].
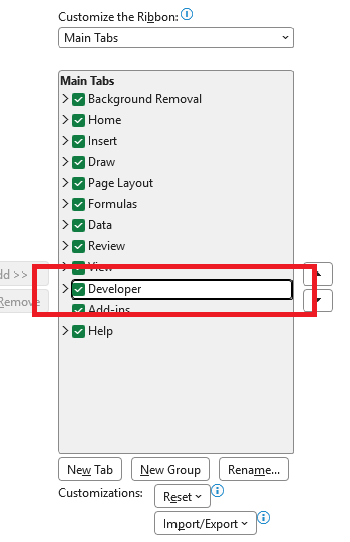
If you now see the “Developer” tab on your top menu bar, you are good to go!

Step 2: Open the Code Editor (VBE)
Next, let’s open the VBE (Visual Basic Editor), which is the dedicated window where we write code.
- Mouse Action: Click the [Visual Basic] button on the far left of the [Developer] tab.
- Keyboard Shortcut: Press
Alt+F11on your keyboard simultaneously.
A new window will pop up over Excel. Don’t worry if there are unfamiliar menus—you only need a few simple functions.
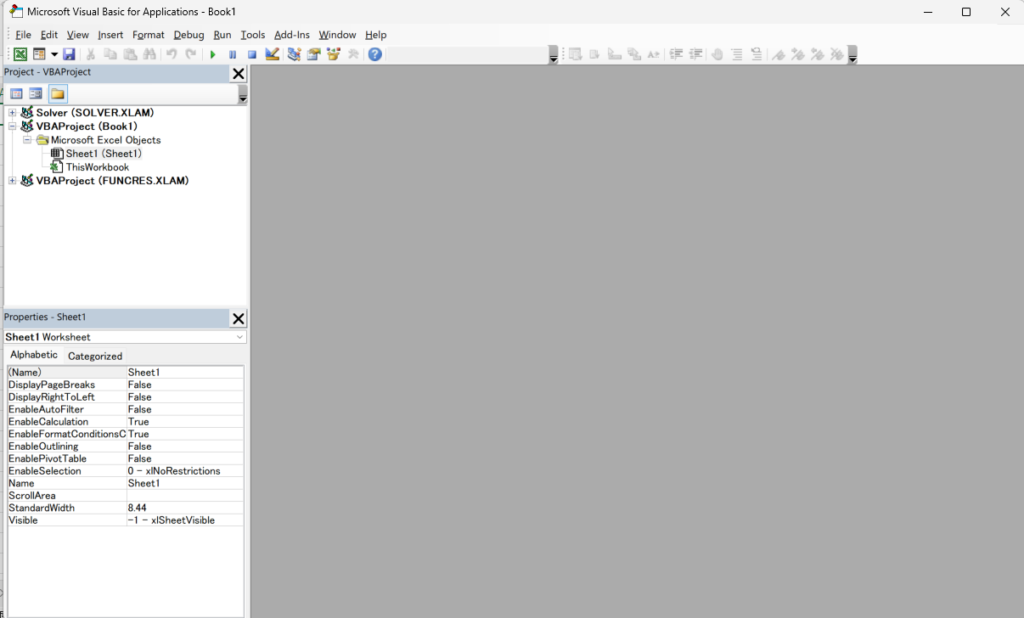
Step 3: Insert a “Standard Module”
Think of a “Module” as a blank sheet of paper where you write your program.
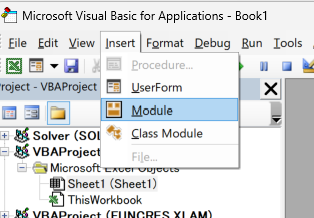
- In the top menu of the VBE window, click [Insert].
- Select [Module].
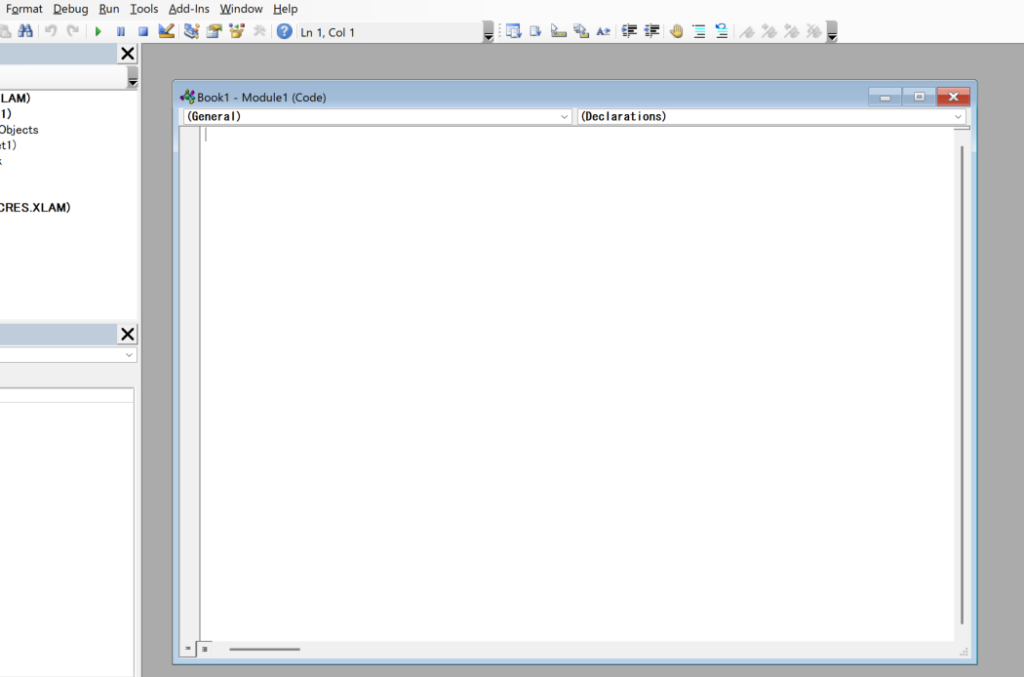
A white code window will appear in the center. This is where we will write our instructions.
Step 4: Prepare the Excel Sheet (Grid Setup)
Before writing the code, let’s set up the Excel sheet. We will create a simple animation: filling a column of cells with color from top to bottom.
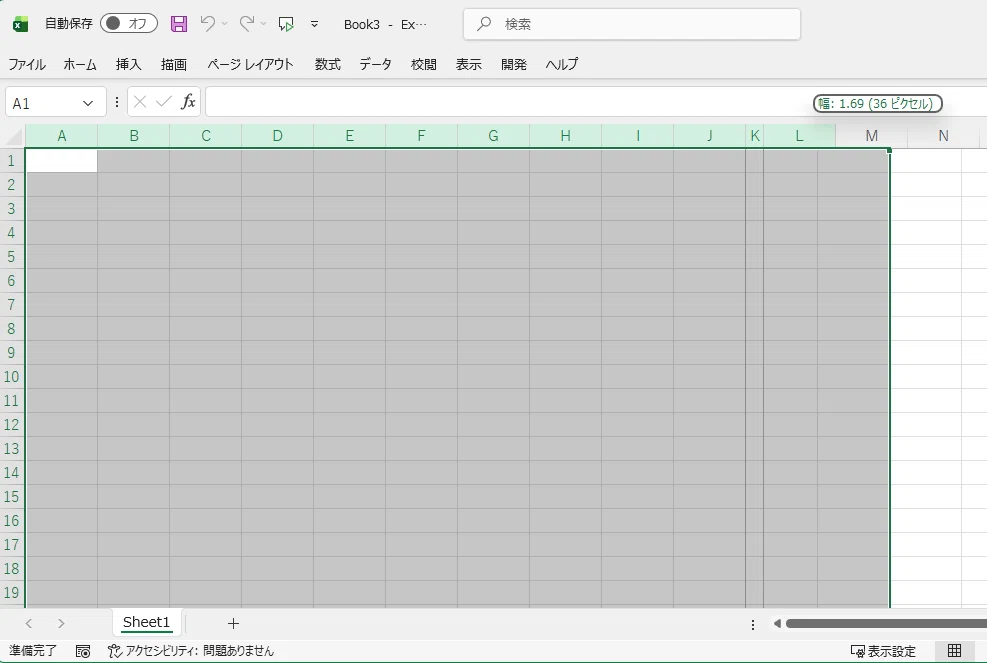
- Make the cells square (Grid Paper style): Select about 50 columns (A through AX) by dragging across the column headers, then resize any one column to make them narrower. All selected columns will shrink to the exact same width.
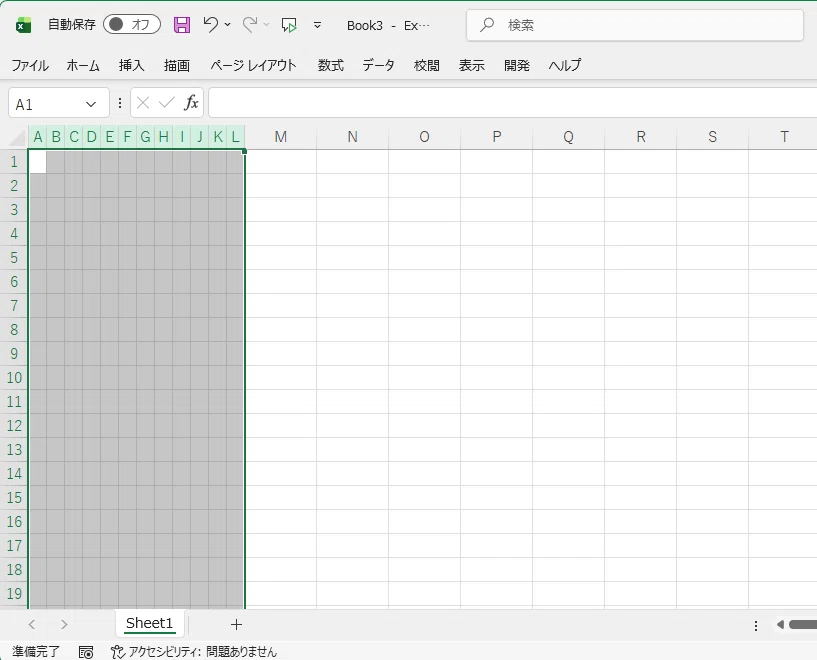
- Repeat the process for rows so the cells become clean squares.
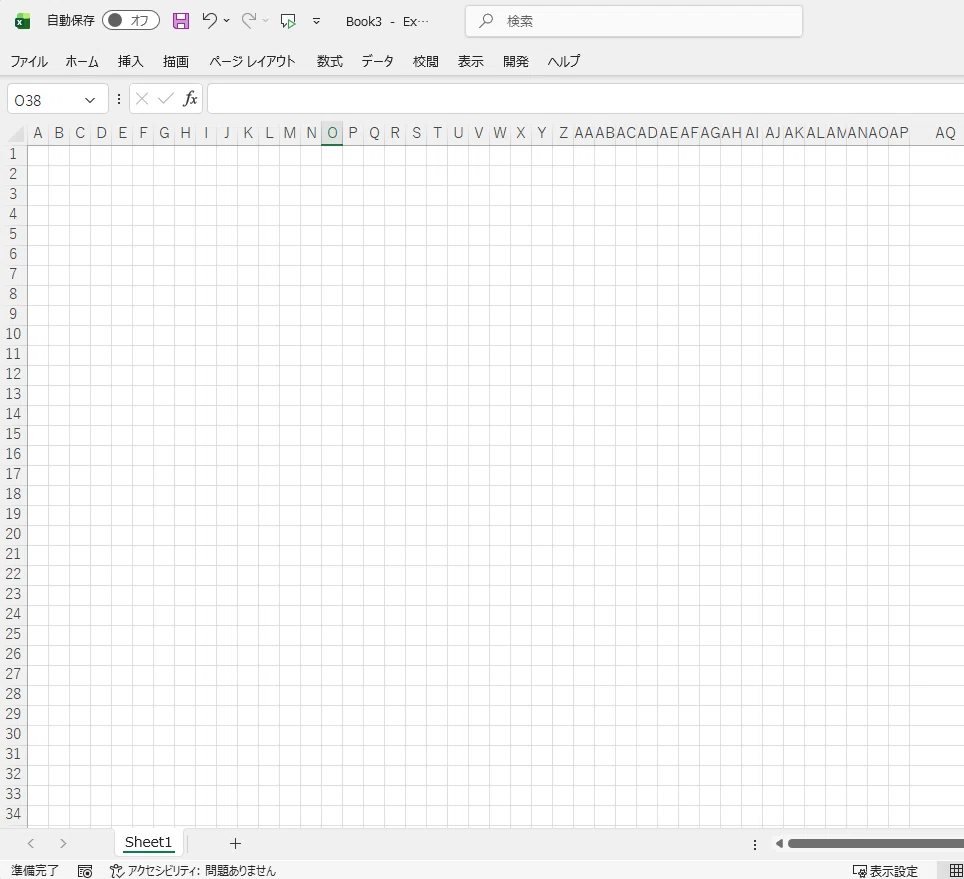
- Set the trigger values: In column P (roughly in the center of the screen), enter the number
1in rows 1 through 30.
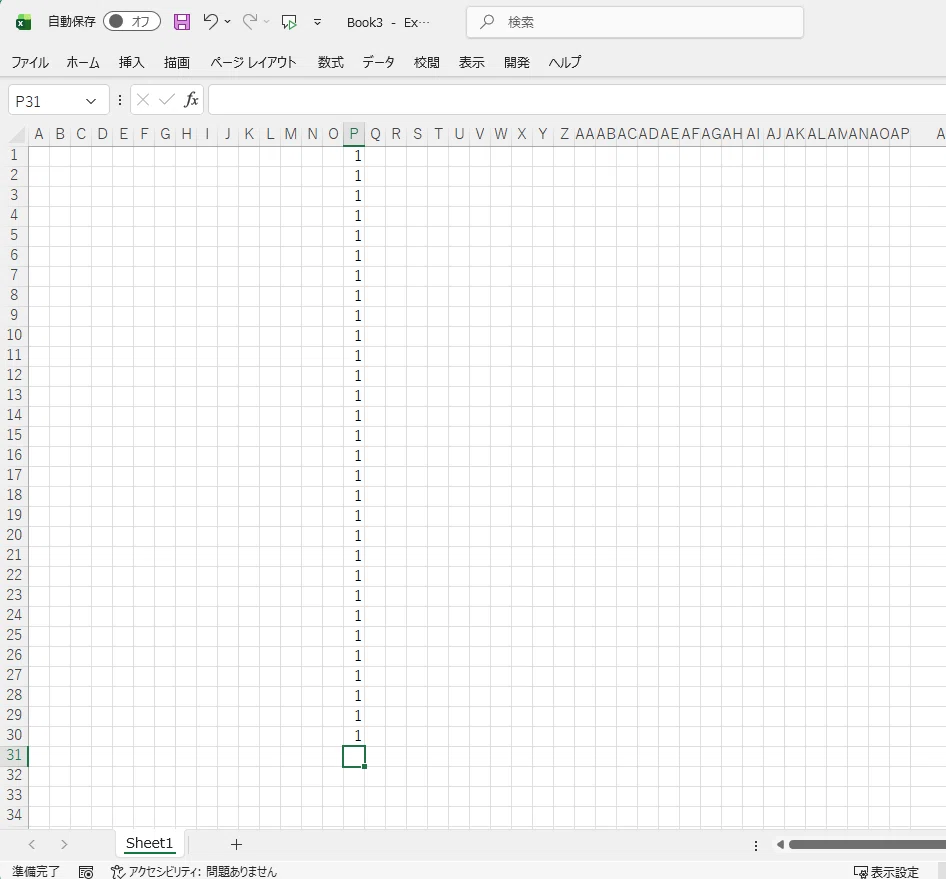
Now your sheet prep is complete!
Step 5: Write the Code
It’s time to write the actual program.
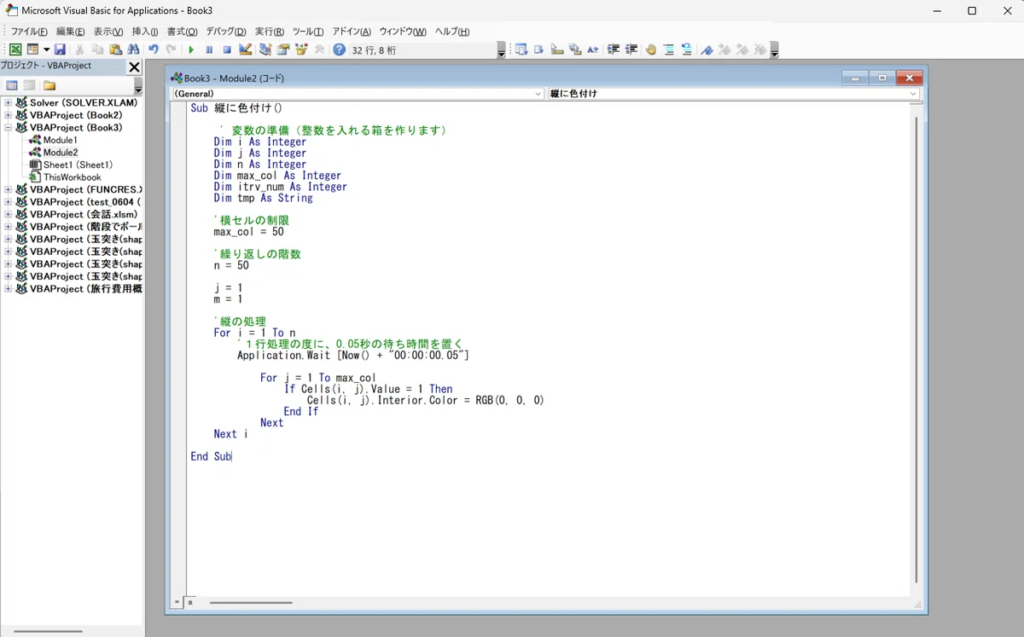
Copy the VBA code below and paste it directly into the white code area of the Standard Module you created.
This code checks the cells row by row from top to bottom. Whenever it finds the number 1, it fills that cell with black.
Sub ColorVertically()
    ' Variable declarations (creating containers for integers)
    Dim i As Integer
    Dim j As Integer
    Dim n As Integer
    Dim max_col As Integer

    ' Set column limits and iteration count
    max_col = 50
    n = 50

    ' Vertical processing loop
    For i = 1 To n
        ' Pause for 0.05 seconds per line to create an animation effect
        Application.Wait [Now() + "00:00:00.05"]

        For j = 1 To max_col
            If Cells(i, j).Value = 1 Then
                ' Fill the cell with black color
                Cells(i, j).Interior.Color = RGB(0, 0, 0)
            End If
        Next j
    Next i
End Subtion Complete!"
End Sub
It turns out like this.
Step 6: Run the Program!
Now for the exciting part—running your animation!
- Place the two windows (Excel and VBE) side by side so you can watch the sheet while running the code.
- Click anywhere inside the code you just pasted.
- Click the
▶(Run / Play button) on the top toolbar (or pressF5).
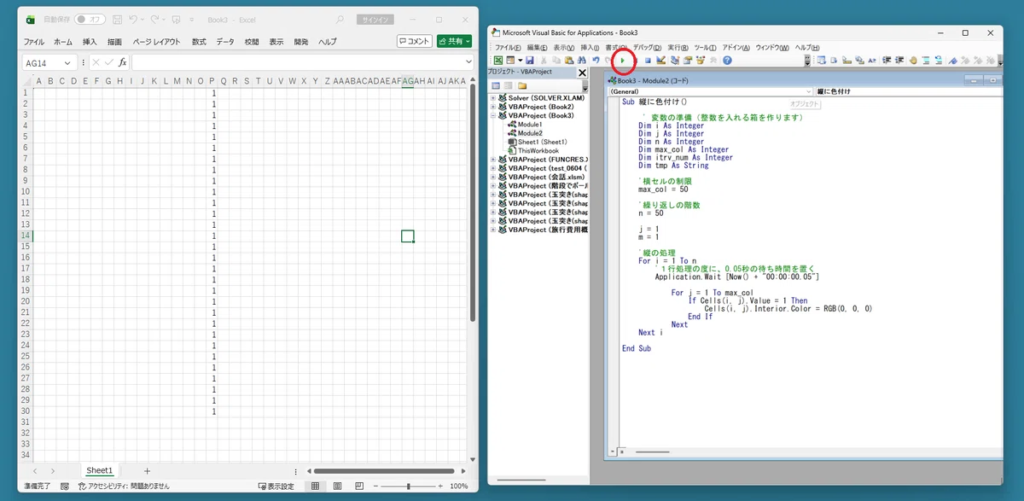
Watch your sheet! You should see a black line drawing itself smoothly from top to bottom.
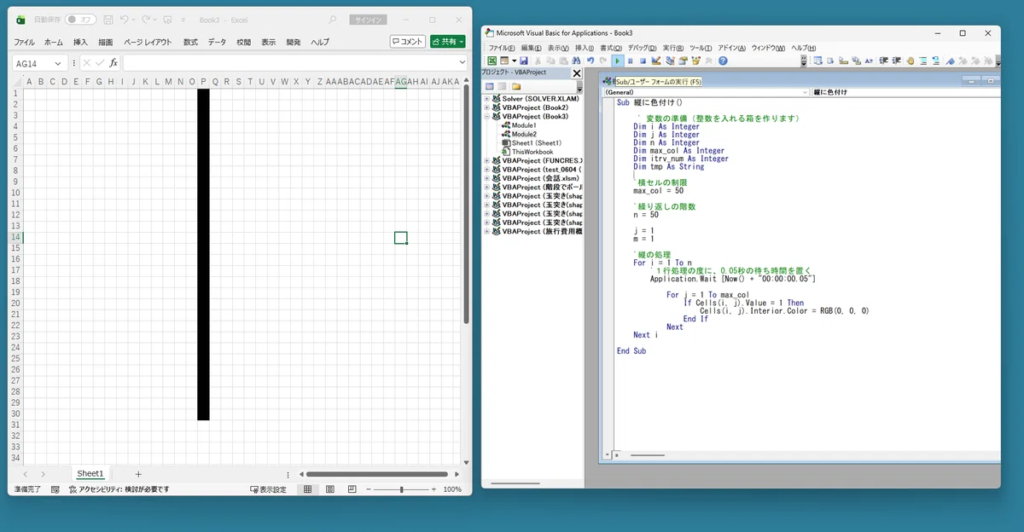
💡 Quick Tip on Animation Speed: The line
Application.Wait [Now() + "00:00:00.05"]creates a tiny 0.05-second delay. Without this pause, Excel would process everything in a fraction of a millisecond, making it look like a static line appeared instantly rather than an animation.
Step 7: Add a “Start Button” on the Sheet
Opening the VBE editor every time can be tedious. Let’s create an interactive button directly on the Excel worksheet!
- Switch to your Excel sheet and click the [Developer] tab.
- Click [Insert], then select [Button (Form Control)] (the top-left icon).
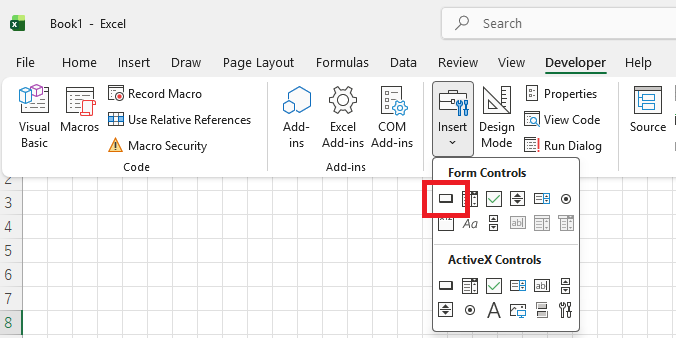
- Click and drag anywhere on the sheet to place the button.
- The “Assign Macro” popup will appear. Select
ColorVerticallyand click [OK]. - Edit the button text to something like “START!”.
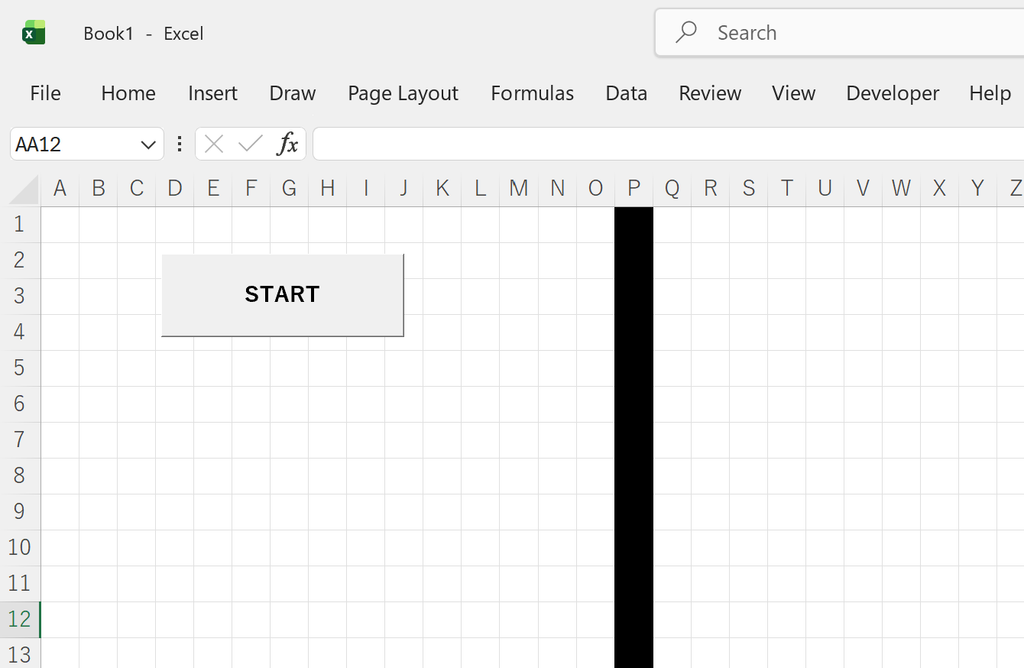
Now, simply clicking this button will trigger your animation whenever you want! (To reset, just clear the fill color of the cells).
Conclusion
What do you think?
Excel is often viewed as a rigid business tool, but with a little creativity, it becomes a canvas for interactive pixel art and animations.
This tutorial used a simple straight line, but by changing the arrangement of numbers or altering RGB(0, 0, 0) to different colors, the possibilities are infinite.
Try customizing the code and build your own exciting Excel creation!
コメント